Thursday, January 7, 2010

The one that got away

Picture source: Ebay


Did you ever pass something up at the flea market, antique store or at a garage sale....and then had regrets?


For me it was a scale like the one above only older and chippier *sigh*. It was love at first sight and $40. I lingered at it for a while and eventually walked away due to cranky kids and a hungry hubby. I've been kicking myself ever since! The hunt is on to find another like it, one of these days I'll come across the perfect one and it will be mine.


Tell me about your one that got away.


Happy Thoughts

I have a friend, her name is Sarah. We "met" on a pregnancy forum in 2004 and have been friends ever since. I love her and her adorable family to pieces. Not sure how you can love someone you've never met in person (she's in Texas and I'm in Pa....it's a problem) but I do.

How cute are they??


Sarah is pregnant with her third precious baby and recently found out about a complication. This complication means she has to sit her tush on the couch and rest. Not much fun for this normally active chick. AND her hubby has to work from home to help take care of her and the kiddos. Need I say more?


I'm not one to ask for prayers but if you could send some of those (if that's your thing....if not, happy thoughts are acceptable too) her way, I would so appreciate it.


This is her blog:


http://mamacanon.blogspot.com/


She's bored and her rear end is numb but I know your comments will put a smile on her face.

Wednesday, January 6, 2010

Boring you with burlap


I'm sorry to show you two burlap projects, one right after the other but this was just too cute to pass up. I had to do it, I apologize.


This is my Valentine's Day version, I'll change the ribbon out with the seasons. And please tell me I'm not the only one who had a hard time finding a wire hanger?! We are just not "dry clean only" type people so no wire in this house. I had to go to the dark depths of the closet to find one, it was scary.


For the easy instructions complete with pictures, visit Where The Heart Is.
Thank you Jennifer for sharing this great project!

Tuesday, January 5, 2010

Hot glue and ruffles...

Before I get to the post, I just want to say THANK YOU so much for all the great advice and support on my son's sleeping issues! There is something about getting advice from other moms who have been there, done that. It's the kind of advice you just can't get out of a book (although I had gotten a recommendation for one of those I'm keeping in mind too!).

So far, so good! Day 1 we started at 8:00. We got him jammied up and read a story. Put him in his bed and....he cried. It was really, really hard. He even tried to coerce his sister to go get us for him. Although he never got out of his bed he whined on and off and finally fell asleep around 9:20. Not much fun but we were convinced it was the right thing to do.

Day 2 we started again at 8:00. He told us 1044846363 times that he didn't want to go to bed (you know, in case we didn't hear him the first time) and cried when we kissed him goodnight. BUT, he stopped quickly and was asleep by 8:30!!! Wow!

Honestly, had I known it would go this well, we would have started this routine earlier. He's still coming in our bed during the night but we're off to a great start.


With our sleeping issues on the upswing, I had all kinds of motivation to have that date with my glue gun I talked about in my last post. I had leftover ruffles...and a boring sconce.


I gathered all my supplies. Shades, fabric, ruffle trim, and of course a glue gun. The best thing would have been linen fabric but I didn't have any so I used burlap (is that stuff crazy awesome or what?). Here's the part where I make a weak attempt at showing you how to do this. I'm not a good teacher so bear with me.


Fold your fabric around the shade and glue as you go. Try to stretch the fabric a bit as you do this and hold it with one hand so it goes on without wrinkling up....


When you get to the end, cut a straight line and glue along it. Cut your fabric close to the shade all the way around. Don't worry about it being perfect, you'll cover it anyway.


Fold the top fabric over your shade, cutting a slit for the metal thingy. Technical, I know. Use your glue gun to tack it down. If you've done everything correctly, at this point your shade will look like this and your lap will be covered in lint.....


Now it's time to glue the ruffle. Sandwich your shade edge with the trim and glue the top piece along the bottom edge of the shade. All the way around....


And then you'll glue the bottom piece of the trim to the inside of the shade. Pull the ruffle down a bit as you glue so you get a tight fit and help the ruffle to sit pointing down, instead of sticking out. Easy right??


And when you're done, you end up with this!


Aren't they cute? I may not have ruffle shades but at least I have ruffle sconces!


Happy gluing!


I'm linking this post up to The DIY Show Off! Go check out the home accent party over there:


Monday, January 4, 2010

Kitchen Curtains = Drama


The time had come to put something up on those two big windows in my kitchen. Although I enjoyed having them open, sunlight pouring in....we were starting to feel like a couple of goldfish in an aquarium in a doctor's office waiting room.


I've always loved looking through the Country Curtains catalog. Although so many of their products are either too formal (see below) or too country for me, I always find something I like. And as for the other curtains, I like to sit and imagine what kind of house each one would look best in. I imagine what the room would look like, what the people who order those super formal jacquard and tapestry fabric tailored panels would be like. You don't do that? Okay, moving on...


I spotted these ruffled shades and absolutely loved them. Wasn't so crazy about the price tag so I figured I'd just make them myself. Off I went to Hobby Lobby for some cute ruffle trim and then to Home Depot for roller shades. How simple and cheap was this going to be??? The trim was cheap, the shades were cheap, a little hot glue and voila, instant magic!

After giving my measurements to the lady (measurements which I double checked with hubby so I knew they were right) I went home with my freshly cut shades all ready for an afternoon with my glue gun. Only, wait...they don't fit. Too short. Ugh. Back to Home Depot to see what the problem is. They tell me they've had issues with their machine and will gladly cut me another pair. Phew, that's a relief because I just *knew* I had given the proper measurements. Bring the next batch home, put them up to the window....one is too short and the other one is a different type completely and is also too short. ARGH!

I decide I'm done with Home Depot. Obviously they can't cut a shade properly so I'm off to Lowes! Well now I smarten up and give the measurements as being a little wider. I figure hey, I'm done with short shades. Learned that lesson. I'm having them cut longer so I know they'll fit. Go home with my new shades and wow....their machine works really well because these shades.... are too long. I'm so defeated at this point I debate if I really want these shades. But then I look over at my pretty ruffle trim and decide that yes, they'll look really nice. Back to Lowes and ask if they can cut them down a smidge. She says she'll try and it should work. I'm willing to give it a go at this point. Bring them home, put one up and ohmygosh it fits! At this point I am giddy as I pull the shade down to try it out. It unrolls all right.....it just doesn't stop. You can roll it all day long and when it decides it wants to stop, that's when it stops. The other times it just snaps right back up to the top and the entire shade then falls out of the bracket and onto your head. #^$#@^$^@$%$%$#@$#@!#&*&

About 25 minutes and one small tantrum later where I may or may not have broken the plastic stick that comes with the shade over my thigh and then stomped on it angrily as my horrified hubby looked on......I ran down to the basement, grabbed my bin of castoff curtains and a couple of tension rods and threw up the first white pair of sheers that met my sight.


Now this.....


Is just fine by me. We have privacy, they still let the light come through and no more trips to have shades cut. Yup, I'm one happy camper.


And I did get to order from Country Curtains after all. I bought these holdbacks that I've coveted for months but didn't have a place for. I love the large size and how they sparkle.


Now, what should I do with that ruffle trim? I feel a project coming on. hmmmmmmmmm.....

Sunday, January 3, 2010

Bedtime


I've decided to start off 2010 with a confession. Here it goes...deep breath. My confession is that my 4 year old son doesn't sleep in his bed. And that's not the worst part. The real confession is that he often doesn't fall asleep until 10 or 11 PM. We've been super horrible parents and have slacked off in the bedtime department. He's the 3rd child and the "baby" so you know how that goes.


Most nights he just falls asleep on the couch. Other nights he's wide awake and coming to bed with us wayyyyyy later than he should. On those days I drop him off at preschool the next day and get in my car just hoping and praying that he doesn't act up out of sheer exhaustion. I know he should be in bed at a reasonable hour, I really do, but we've been lazy.


That's all about to change. We've decided it's time to Supernanny him. This week we're going to attempt to undo the bad bedtime habits we've allowed him to get away with and enforce a bedtime routine. And enforce him sleeping in his own room, in his own bed. For his sake and for ours because that boy does not stay still all.night.long. He moves and kicks and takes all the blankets. Yup, it's definitely time for him to sleep on his own.


Wish us luck! If you have any advice, I'm all ears!! I have a feeling this week the entire house will be lacking in sleep. We're all going to look like this....


Project Supernanny Day 1, here we go....


Saturday, January 2, 2010

My Top 9 of 2009


2010! We're so excited to see you! This is going to be a special year, I can just feel it. This will be the year my husband and I celebrate our 10th anniversary, so it has to be a good year. I'm sure of it. I'm looking forward to a year full of home renovations. (When I said this to my husband earlier he kind of made a grunting sound. What did that mean? Don't worry....I'm sure he'll get on board soon.)


Did you all stay up to ring in the New Year? We had a good time counting down with friends and family. We chatted, ate some good food, had a few drinks, took some pictures to remember 2009 by...pictures.....*sigh*.....that made me realize I need to crack open the Wii Active I got for Christmas sooner rather than later. Anywho, it was a nice evening to say hello to a brand new year full of possibilities.


Just one last look back before we move forward with a fresh outlook and a clean slate. These are my favorite projects of 2009 in no particular order. Click below the pics to visit the post:


4. Cabinet Makeover


5. Wallpapering the dishwasher

Which is now white but you know, things change often around here. ;)


6. That crazy blue door

(It's still blue and yes, I love it now!)


7. Organizing the pantry


8. The slamming screen door I dreamt of which I talked about Here and also Here


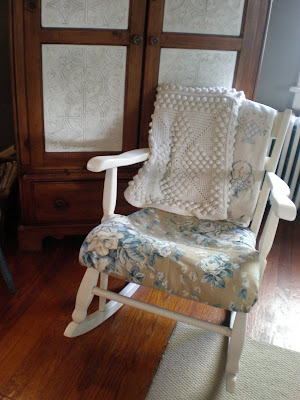
9. Procrastination turned pretty rocker