Thursday, July 23, 2009

A Pantry and a Purchase

We'll start with the purchase since that's the most fun! I have been trying to rein in my online shopping (if only it weren't so darn fun to receive packages in the mail!) but I had to make an exception for this great find. My new Nest banner from House of Whimsy on Etsy. You can find her store HERE .

She has a super cute blog as well! I love the tiny crowns on the birds, very whimsical which is just what you expect from a blog of this name. I'm a sucker for anything with birds...add some glitter and the word "nest" and I'm done for.

http://thehouseofwhimsy.blogspot.com/


This week I worked on our pantry. It was a mess and needed some attention. First, the scary Before shot:


I emptied it all out and rehomed some items that didn't need to be in there. Who needs 6 phone books anyway?!


After a fresh coat of paint....ahhhh......


While that was drying I got to work on the shelves. I found small pieces of decorative trim at Michaels, and used a coupon of course! Wood glue was all it took to put these on. Just hold in place with tape and they dry pretty quickly!


And here it is all organized and pretty. Hopefully it stays this way for a while at least! I used large baskets on the bottom and lots of containers for cereal, cookies, sugar, etc. Not only will they keep the food fresher but they look cute too!


The glass containers were on clearance at Christmas Tree Shops and the new scalloped trim makes me smile when I open the door now.


I added some toile wallpaper to the shelves that I had lying around the basement.


The silver planters from the dollar store hold the little items like sweetener packets and Kool Aid. I just used scrapbooking stickers to label the contents. Another option for this would be a little chalkboard paint which would be super cute as well!


It feels good for everything to be in its proper place. Now the tricky part will be to keep it this way for any length of time!

Monday, July 20, 2009

Outside Stuff

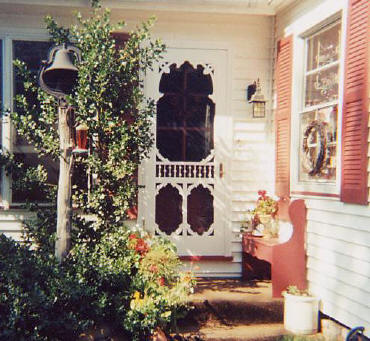
The outside painting is coming along. I finished the shutters and the new screen door with a couple coats of green paint. The color is "Shortgrass Prairie" by Behr and it was a total spur of the moment purchase. I actually walked into Home Depot with another paint chip. If you've been reading my blog for a while you know I've gone off the deep end deciding on paint colors for the shutters. I just couldn't figure out what color to do and stressed over it. In the end I went to Home Depot, paint chip in hand and then grabbed a random color off the rack and asked them to mix it. No idea where that came from. It caught my eye so I went for it. Here's the result:


The screen door wasn't quite cute enough so I added this wreath applique...
This is what the house looked like when we bought it.....

And here it is now....

I'm really happy with how the walkway turned out...


The door topper came from The Country House .


I still haven't taken down my Fourth of July decor....


We've had this bench for a while now and I'm really tiring of it. I'll probably spray paint it chocolate brown like the wicker. And I'll use the spray paint attachment to save my hand (thanks to all the bloggers who suggested this!). Sewing some new pillows is also on the list.


Shall we head to the backyard?


I started working on the garage as well. I don't have a before pic on this computer but I changed the door panels from yellow to green and the hinges from red to black. It's coming along nicely. We still have to paint the rest of the trim and the garage itself which will be done in a neutral tan. I absolutely love our garage doors....


This back screen door was another addition, also painted green. Say hi to Tucker and Sebastian! They were anxious to come outside and play!


As promised here are pics of the backyard after the tree removal. Notice anything different from the front? Yup, our house is two different colors. The back is an addition and the siding wasn't matched to the rest of the house. Now that the tree is out we realize just how ugly the back of our house is, it was hiding before!
We hope to reside the entire house (in one color of course) in 3-5 years. Until then we'll do what we can with it. A patio is on the list as well as lots of landscaping!


We have a clean slate to work with back here. The addition of sun in the backyard really opens up planting possibilities....which is fun and overwhelming at the same time!


I'll probably take the next year to come up with a landscaping plan and put it in place next spring and summer. That should give me enough time to figure it all out......I hope.

Tuesday, July 14, 2009

Spray Painting and Carpal Tunnel

This summer has been so leisurely for us, I'm having trouble keeping up with what date it is! The days are relaxed but also going fast. This past weekend I decided to get some spray painting projects accomplished. I couldn't post until today because ouch, way too much spraying for one day. My hand and wrist hurt so bad I could hardly type or write. It's getting better but I think I've learned my lesson on doing too many projects in one day! No pain, no gain....isn't that what they say? Oh, not about spray painting you say? Okay, moving on....do you remember this candelabra from the thrift store?


I finally came up with a great place for it, the porch! My new favorite color is Rustoleum Heirloom White in satin finish. Perfecto!


I also wanted to redo this corner shelf in my dining room. It wasn't my style but it belonged to my Granny so I wanted to make it work in my house.....


Here it is after a fresh spray of Heirloom White and a little distressing of course!


This cheese dish came from a yard sale and the base is wood. I don't intend on using it for food so the bottom got a fresh coat of.....do I need to say it? You are noticing the color pattern here I'm sure....


And then there were these two little stools. No before pic because I forgot but the top one was red and the larger stool on the bottom was green. See how I mixed it up a bit on you there, the bottom stool is done in a light blue. I didn't stray for long because....


...we are back to the same white. The frame was another yard sale find and natural wood. I love what a little white paint can do!


After that was all done (and before the hand agony set in) I got around to working on that dishwasher project I've talked about. It bothered me that our dishwasher is glaring at you when you walk into the kitchen. I like stainless appliances but just not this particular one. Here's what it looked like....

And this is after adding paintable wallpaper. I really wanted to add those faux tin tile backsplash pieces to it (you can find them in the kitchen section of Home Depot) but our dishwasher was rounded on the sides and I didn't think it would look right. Plus I wanted to paint it the same as the cabinets. So this is my solution, a roll of 50 cent wallpaper from a yard sale.


This is how it looks now after a coat of paint. I still have one more coat to do and then I'll seal it with Valspar sealant made for painted surfaces.
Now I have a huge disclaimer on this and that is, don't rush and do this! Please! I don't want an angry mob at my door after you all wallpaper your dishwasher and the paper falls off leaving the front ruined. I'm not sure this is going to work! It is prepasted wallpaper but I used additional adhesive and lots of glue to put it on. I'm still unsure if it will stay because what do you use to remove old paper from walls? Yup....steam. And dishwashers put out lots of that. Give me a month or so and I'll report back on if this is working out or if I'm picking up pieces of wallpaper from the floor. If my gobs of glue trick doesn't hold, it'll be on to Plan B. No clue what Plan B is but hey, sometimes decorating is about being fearless right? I'm sure I'll figure something out.


Oh and did you notice the sink skirt? One thing I was bummed about with our new dresser island was that my favorite ticking stripe fabric would be gone. The room needed some more softness and I couldn't part with this fabric so I hemmed it up and put it below the sink.


I hope you are having a fabulous summer so far! I have a feeling I'll be blogging a lot more once the fall rolls around. Right now it is just too beautiful outside to be on the computer. Ahhhh, the lazy days of summer..... :-)

Thursday, July 9, 2009

How Not To Have A Birthday


Don't add way too little breadcrumbs to your meatballs so they end up tasting like lumps of beef straight from the cow....

Don't buy garlic bread that is so garlic-y everyone in the house has to be quarantined for two days so the smell can dissipate....


Don't wait until the last minute to plan decorations and end up having the kids scribble on scrap paper while mom hovers over holding the tape and checking her watch....


For goodness sake, try not to burn the lasagna so much the top half is barely recognizable....


DO breathe a huge sigh of relief that the inside of the lasagna looks like this....


...And an even bigger sigh that they are all still smiling at you.


Thank goodness my family accepts my lack of culinary skills....next year on my hubby's birthday the only thing I'm making is reservations.


Monday, July 6, 2009

The Slamming Screen Door

Photo: touchstonewoodworks.com

Photo: mainemade.com


Photo: buildingonline.com


Photo: This Old House.com


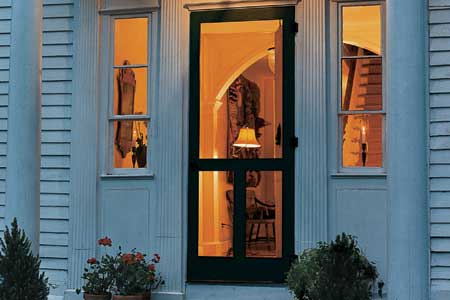
We've been wanting to add wooden screen doors to our home so that the breeze can come through. We had one on the front when we moved in, a T bar style, but it ended up ripped last fall and we wanted another style. After seeing how beautiful Artie's door came out, I was really chomping at the bit. Artie has a lovely blog called Color Outside the Lines, you can read more about his door HERE .


The problem we had, like many people with older homes, was that our door is not a standard length. Home Depot and Lowes both had a great selection of screen doors but none that would fit. We looked into woodworkers who would make a custom door but the price was high, as expected. Since I'm way too cheap....errr...budget conscious for that we decided to make an off the rack door work.


What you'll need to do is pick the door you like and then purchase a piece of wood (we used pine). You'll also need wood glue, dowels and some clamps. Here is our door and the extra piece of wood:


Measure how much extra you need at the bottom and cut your board to size. Here it is with the dowels in. After you have your dowels in place and the holes drilled on your extra board, cover it all with wood glue and stick your extra piece on there. Hold it together with clamps until it dries and voila....the door is the perfect length!


If you have a small space between the door and your extra piece of wood, a little putty can be used to make it look seamless. Then just paint it up and you have a "custom" door for a small price.


The door we picked has a removable screen so that makes painting or staining it much easier. I still have the second coat of paint to do and I'll show you the finished product. We also have the shutters back up, mulch in place and a place to sit on the porch. It's really coming along out there and having a place to sit with a cup of coffee and a magazine is wonderful. I'll be back with the finished pictures soon.

I hope you all had a wonderful 4th! We did a little camping and watched some fireworks. The weather cooperated, all in all a beautiful weekend!